To Download the iso-image of actual ESXi, you have to complete the free registration on vmware.com.
Registration is strict required otherwise you will be not able to download the installation media and the free license.
Now you have the installation iso, like this one: (VMware-VMvisor-Installer-5.5.0.update02-2068190.x86_64.iso)
Burn to CD/DVD or dd to a USB-flash disk if you don’t have any blank CDs or DVDs.
After Download of a iso fine, you will find a free licence key, will looks like this one:
NXX8X-AXJX5-LXRX9-0X1XP-3XJXK
SSD-Storage
Enabling the SSD option on SSD based disks/LUNs that are not detected as SSD
1 | esxcli storage nmp device list |
Output of the above command is like this one:
naa.644a8420026a23001c5bd19105e233f1
1 | esxcli storage nmp satp rule add --satp=VMW_SATP_LOCAL --device naa.644a84200268b1001c5bd673084bb859 --option "enable_local enable_ssd" |
Network and routing
Show routes:
1 | esxcfg-route -l |
Set a global default route:
1 | esxcfg-route -a default 10.1.10.254 |
Set a static ip for the interface vmk0:
1 | esxcli network ip interface ipv4 set -i vmk0 -I 100.1.130.130 -N 255.255.255.0 -t static |
Nice to have
Punchzero alias hrink vmdk alias holepunching
1 2 3 | vmkfstools --punchzero wooki.example.com.vmdk # or following short alias vmkfstools -K wooki.example.com.vmdk |
SSH-Key authentication
For ESXi 5.0, the location of authorized_keys for root is: /etc/ssh/keys-root/authorized_keys
More than one key can be stored in authorized_keys-file
1 | /etc/init.d/SSH restart |
Rsync
Out of the box ESXi brings only scp, if you are missing rsync, this is a possible installation way:
rsync in version 3.0.9 protocol version 30
1 2 3 | wget http://zeldor.biz/other/esxi/rsync mv rsync /usr/bin/ chmod +x /usr/bin/rsync |
vSphere client
Quick access your ESXi-server with a Windows batch file:
1 2 3 | @ECHO OFF "C:\Program Files (x86)\VMware\Infrastructure\Virtual Infrastructure Client\Launcher\VpxClient.exe" -s 10.1.60.91 -U root -P "Y0ur!PaSsw0rd" exit |
reverse ssh
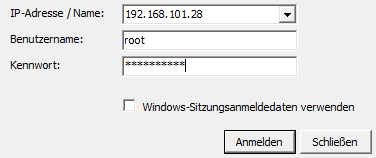
Reach a ESXi server behind a firewall or router via vSphere client over an ssh-tunnel can be somethimes very useful
1 2 | sudo ssh -N -L 192.168.101.28:443:172.18.20.10:443 root@router_or_firewall sudo ssh -N -L 192.168.101.28:902:172.18.20.10:902 root@router_or_firewall |
192.168.101.28 – IP of a local system
172.18.20.10 – ESXi IP-Addr.

Port 443 could be enough but if you with to see the console of your vm you have additional to tunnel port 902.


Leave a Reply