

Hallelujah! My Arduino kit arrived it was a really far way for it, it was shipped from Hong Kong.
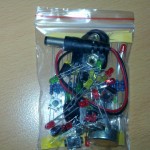
It was seized for one week by customs office in Germany and, now its arrived at my workplace. The package consists of tiny little packages with following content:
Arduino-KIT Include:
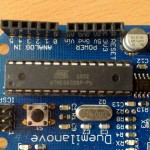
* 1X Arduino Duemilanove ATmega 328 board
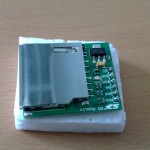
* 1X SD card module
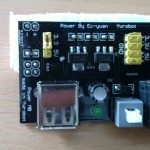
* 1X 3.3V/5V Power module
* 1X High quality Breadboard
* 1X Motor driver module
* 1X 5V Stepper Motor
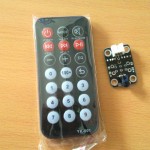
* 1X IR Transmitter Module
* 1X Sensor connector cable
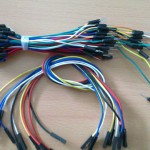
* 1X bundle Breadboard Jump Wires (65 pcs)
* 1X 9v power adapter
* 1X 40Pin Straight Male Headers
* 10X Arduino Jumper cable
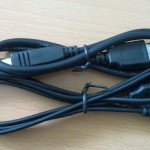
* 1X USB to DC cable
* 1X USB cable
* 1X IR Remote Control
* 1X Infrared Receiver
* 1X IR Sender
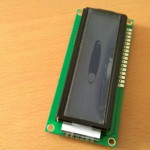
* 1X 1602 LCD Blue Display
* 1X 10k Potentiometer
* 1X Buzzer
* 10X Mini Push Buttons
* 10X Red LEDs 3mm
* 10X Yellow LEDs 3mm
* 10X Green LEDs 3mm
* 10X 220Ω Resistors
* 10X 10 kΩ Resistors
Unboxing:


Install Arduino IDE:
The open-source Arduino environment makes it easy to write code and upload it to the i/o board. (Download the Arduino Software)
Installation, Debian/Ubuntu way:
1 | root@crunch:~# apt-get install arduino |
Install arduino on Fedora system:
1 | sudo yum install arduino |
Windows and Mac OS X users can retrieve the latest version from offcial arduino web site:
Windows user dont need to install the IDE-Software, its portable – extract, run and delete :-)
First project with Arduino:
I will bring one LED to blink, this is a very easy project. Take a look at the connections:


PS. In the next post I will tell you how to create your own sketches for Arduino. Its a really cool way to share your projects with your friends and other Arduino interested people.
An LED connected to digital output pin 13 through a resistor, I recommend you to take a 220Ω-Ohm resistor to protect you LED.
Now plug your Arduino board into your computers USB-port, start the Arduino-IDE program, and enter the code below.
1 2 3 4 5 6 7 8 9 10 11 12 13 14 15 16 17 18 19 | /* First Arduino Project <zeldor.biz> Let the LED blink This code will turn on your LED for one second, then off for one second, repeatedly=loop. */ void setup() { // initialize the digital pin as an output. pinMode(13, OUTPUT); } void loop() { digitalWrite(13, HIGH); // turn LED on delay(1000); // wait one second digitalWrite(13, LOW); // turn LED off delay(1000); // wait one second } </zeldor.biz> |
Press Compile button: 
You will see a message: Done Compiling.
Now you can upload the compiled code to your board, to do that press 
Windows Troubleshooting: (can only happen to a Windows system :P)
You try to upload your compiled code to your board, and get this warning?
1 | avrdude: stk500_disable(): protocol error, expect=0x14, resp=0x51 |
![]()
1. Click on the Start Menu, and open up the Control Panel.
2. Navigate to System and Security, click on System. Open the Device Manager.
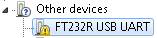
3. Look under Ports (COM & LPT). You should see a unknown USB-Device:
4. Right click on that device choose “Update Driver Software” option.
5. Next, choose the “Browse my computer for Driver software” option.
6. Finally, navigate to and select your Arduino-Software folder.
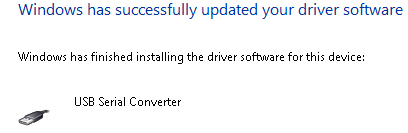
Arduino driver was successfully installed:

You get still the same error?
Check your Arduino IDE-Software Settings and choose the right model of your Arduino:

Another error that occur if arduino was connected over USB-hub or to the front USB of a PC
1 | avrdude: stk500_recv(): programmer is not responding |
Solution: Do not go through a usb hub – straight to the PC!
Stay tuned for my next Arduino LCD-Display tutorial;)

Paolo: It´s a 100% Clone of Arduino, it really doesn´t matter how was it made and who made it. Because everyone of you can make his or her own arduino clone-board – Example (http://bit.ly/nQM31r). And the question is, what do you mean by “original” understanding? The price? or label? Which piece of electronics in arduino must be original?
Pity you just bought a fake Arduino.
ATmega328 is a kind of beginner board. By the way, both boards(new versions of them) has the same ATmega328 Chip and that means they have the same parameters like Flash and ROM space. On wikipedia(http://en.wikipedia.org/wiki/Arduino)is a great overview of all Arduino-boards with all parameters.
I had the same problem, with this choice :-), that helped me with my decision. Some time later, a saw this Kit on ebay and ordered it.
Why did you pick ATmega 328 instead of Uno? Long time ago, I was thinking one, just I don’t make a decision yet. I think I saw your kit in eBay, but I thought it might be a fake, because it was so cheap. Anyway, just keep on posting and I’ll see what to do with Arduino. Cool !!